Describe What You Can Do to Install Windows 7 if Your Computer Does Not Have a Dvd Drive.
Z7_3054ICK0KGTE30AQO5O3KA30N0
hp-concentra-wrapper-portlet
![]() Actions
Actions
HP Notebook PCs - Installing Software from Discs Without a CD or DVD Drive (Windows vii)
This document pertains to HP Notebook PCs without a CD or DVD drive.
Some HP computers, such every bit HP Mini notebook computers, practice non accept CD/DVD drives. If you desire to install software from a disc onto a computer that does not have a CD/DVD drive, utilize one of the methods described in this document.
Installing software using an external USB CD/DVD drive
An external CD/DVD drive can be plugged into whatsoever available USB port on your notebook. To use an external USB CD/DVD bulldoze to install software on your notebook, follow the steps below.
-
Plug the USB cable into one of the USB ports on the notebook.
-
For instructions on installing and using your external bulldoze, meet the documentation that came with the USB CD/DVD drive.
-
After installing the drive, insert the software disc into the drive and proceed with the software installation.
Installing software using a USB thumb drive
Using a different computer that is equipped with a CD/DVD drive, the files on the software installation disc tin can be copied onto a USB thumb drive and then transferred to the computer that has no CD/DVD drive. To use a USB thumb drive to install software on your notebook, follow these steps:
-
Insert the software installation disc into the CD/DVD drive.
-
If an AutoPlay window appears, click Open folder to view files.
If an AutoPlay window does not announced, click Starting time
 , click Reckoner, so double-click the CD/DVD drive.
 -
Select all files and folders, then right-click and select Re-create.
notation:
If a window appears with a prompt stating There are subconscious files or folders. Would y'all like to include these in your choice?, click OK.
-
Insert a USB thumb bulldoze into a USB port on the figurer that has a CD/DVD drive.
-
If an AutoPlay window appears, click Open binder to view files.
If an AutoPlay window does not appear, click Showtime
, click Computer, and then double-click the USB thumb bulldoze. -
Create a new folder on the USB thumb bulldoze by right-clicking a blank area within the window and selecting New and then Folder. Name the new folder the name of the software.
-
Double-click the new binder to open it. Right-click within the binder and select Paste.
-
When the file transfer is consummate, close the window and remove the USB pollex drive from the computer.
-
Insert the USB thumb drive into a USB port on the calculator that does not have a CD/DVD drive.
-
If an AutoPlay window appears, click Open binder to view files.
If an AutoPlay window does not appear, click Start
, click Computer, so double-click the USB thumb drive. -
Double-click to open up the software binder, and and so locate a file named Setup.exe, Start.exe, Install.exe, or similar.
-
Double-click the file and proceed with the installation.
Sharing a CD/DVD drive with some other computer on a wireless network
Setting up a wireless network allows you lot to share the CD/DVD bulldoze on another estimator on your network, and and then employ the shared drive to install the software.
Before using the following steps, you volition need to set upwards a wireless network to connect your computers. If you demand help setting up a wireless network in Windows 7, please see Creating a Wireless Abode Network (Windows 7).
Use the post-obit steps to enable your networked computers to share a CD/DVD drive, and then install the software.
Step 1: Configure settings to share the CD/DVD drive
To share your CD/DVD drive between two computers on a network, follow the steps below. Perform these steps on the computer that has a CD/DVD drive.
-
Click Start
, click Computer, right-click the CD/DVD bulldoze, and so select Properties from the driblet-downwards menu.Figure : CD/DVD drive Properties
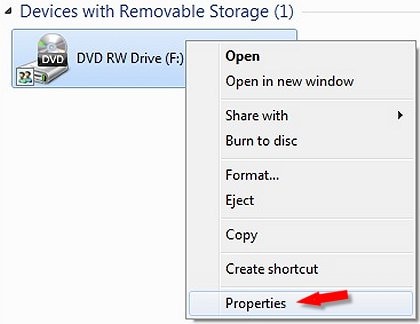
The Backdrop window opens.
-
In the Sharing tab, click Advanced Sharing.
Effigy : Advanced Sharing
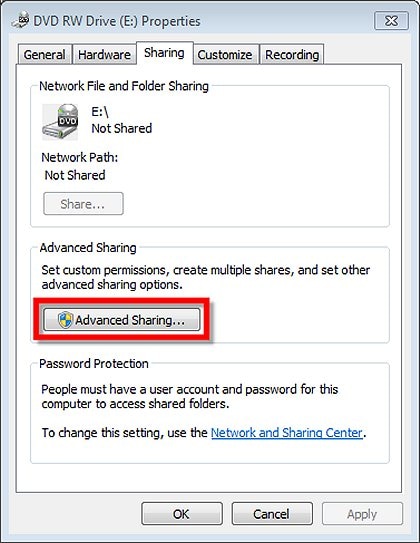
The Avant-garde Sharing window opens.
-
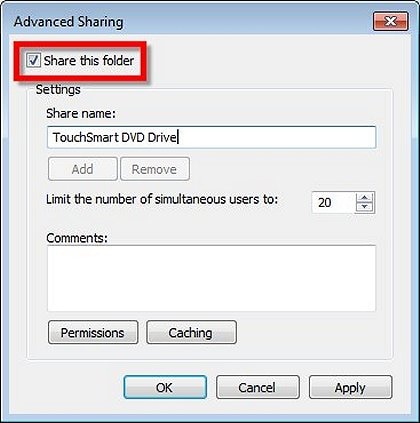
Select the Share this folder checkbox.
Effigy : Share this folder
-
In the Share name field, type a name for your CD/DVD drive and then that it will be easy to identify from some other reckoner, and and then click Utilize. Exercise non click OK.
-
Click Permissions to open up the Permissions window.
-
Under Group or user names:, verify that Anybody is listed. If information technology is non already listed, click Add, type Everyone into the object proper noun field, and and then click OK.
-
In the Permissions for Anybody field, in the Allow column, select the Full Command checkbox, and then click OK.
Effigy : Let Full Control
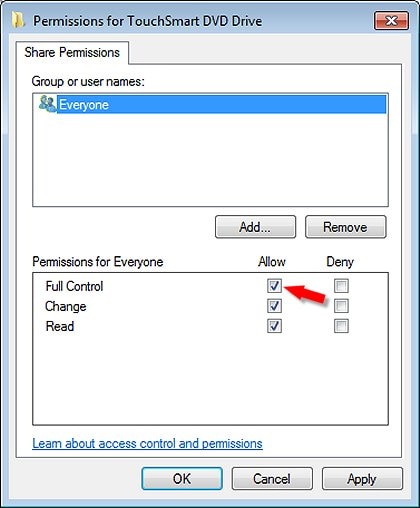
You can at present access your CD/DVD drive from other computers on your network.
Footstep ii: Install software from a shared CD/DVD drive
After sharing the CD/DVD drive, you can apply information technology to install software on the computer that has no CD/DVD drive, using your wireless network.
To install software, follow the steps below.
-
Connect both computers to your network.
-
Insert the software installation disc into the CD/DVD drive so that you volition be able to access it beyond the network.
-
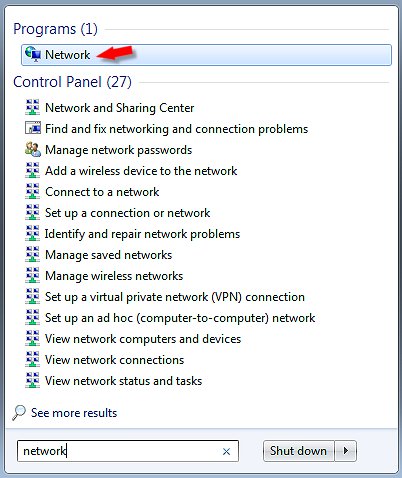
On the figurer that does not have a CD/DVD drive, click Start
, and enter network into the Search field. Click Network from the listing of results.Figure : Opening Network from the Commencement menu
-
Double-click the name of the estimator with the shared CD/DVD bulldoze that yous want to use.
If prompted, enter your username and password.
-
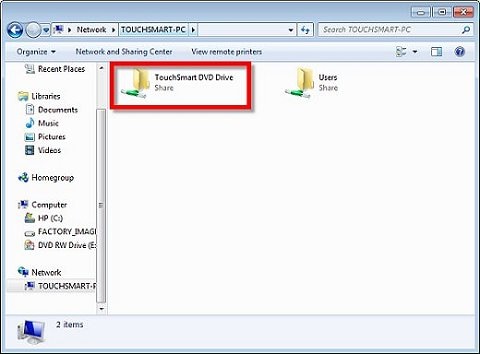
Double-click the binder for your CD/DVD drive.
Effigy : Shared CD/DVD drive binder
-
Locate a file named Setup.exe, Offset.exe, Install.exe, or similar.
-
Double-click the file and continue with the installation.
You can at present install the software on your figurer as yous normally would install it. HP recommends unsharing or limiting permissions for your CD/DVD bulldoze after the installation is complete.
Source: https://support.hp.com/ro-en/document/c03430030
0 Response to "Describe What You Can Do to Install Windows 7 if Your Computer Does Not Have a Dvd Drive."
Post a Comment